

MetaMask is the ultimate Ethereum wallet used by over 21 million active users. Similar to other crypto wallets, it is available as a browser extension, android, and iOS application. With MetaMask buying and transferring Ethereum-based tokens is undoubtedly feasible. Users can create a mint-conditioned NFT collection and store it in their MetaMask wallet. Although MetaMask is a free crypto wallet, it is also software that connects to any Ethereum platform. In Web3 authentication, MetaMask is a bridge that can authenticate and access Ethereum-based dApps, and facilitate the communication between web applications and blockchain. With that being said, having a MetaMask wallet is a part of our lifestyle in the 21st century. Have you set up a MetaMask account?
In Web3, authentication is the prime focus for accessing every decentralized application; When users check out your dApp, you would definitely want them to authenticate and sign in with a cryptocurrency wallet: MetaMask.
Now that we have had a sneak peek into MetaMask, let’s dive deep into the MetaMask wallet and learn how to set up a MetaMask account. In this guide, you will learn how to set up a MetaMask account from scratch, how to change blockchain networks in Metamask, and conclude with a few takeaways.
What is a MetaMask Wallet?
The credit for developing the popular wallet MetaMask goes to ConsenSys. Back in 2016, it was designed for interaction with Ethereum, one of the leading smart contract chains. Today, it has evolved as a powerful authentication tool for dApps, and it also caters to a wide range of blockchains in tune with Ethereum Virtual Machine.
The emergence of cryptocurrency and decentralized applications (dApps) has led to the foundation of Web3 and the decentralized internet. Crypto wallets have paved the gateway to the ever-growing world of Web3, dApps, NFTs, and decentralized finance.
MetaMask is a leading crypto wallet based on browser integration that allows users to store Ether and ERC-20 tokens; Once installed like any other browser extension, it enables users to perform Ether transactions and authenticate Ethereum-based dApps.
If you are a beginner in this space, don't worry, we will introduce you to MetaMask. Or, if you are a developer building an Ethereum-based dApp looking for a way to validate users on the platform, then MetaMask is your one-stop solution. MetaMask authentication is gaining huge popularity.
Why MetaMask Authentication and How to Authenticate with MetaMask?
In the Web3 realm, authentication is everything. If a user fails to log in to the blockchain, then the Web3 app is most likely to fail. With a good command of backend infrastructure, Moralis enables budding developers and builders to implement Web3 Authentication to their web3 app in minutes. It enables web3 apps to log in users to the blockchain effortlessly.
After users log in to the Web3 applications using crypto wallets like MetaMask, they can connect to a specific blockchain. These applications allow users to interact with the crypto network once they are authenticated and have a green signal to proceed with interactions with other users on the same network. Therefore every Web3 decentralized application needs authentication.
Technically, building authentication for Ethereum RPC nodes from scratch is a time-consuming and tedious procedure. The advent of Moralis and its solutions for integrating authentication with dApps has made web and mobile authentication simple.
Today crypto wallets are essential as they not only store crypto assets but also support multiple chains. These wallets are a critical tool for every blockchain developer. Initially, when web2 was the most prominent authentication tool, emails and passwords would facilitate the authentication. Lately, crypto wallets have taken over as Web3 reigns on the internet.
Among the crypto wallets, MetaMask is already popular. It is a highly capable authentication and validation tool in Web3. Moreover, the added advantage is that MetaMask stores the keys on the device browser rather than the remote server.
How to set up a MetaMask account?
Web3 space is continuously evolving. The concept of cryptocurrency, dApps, and DeFi is no longer incognito. More and more folks seem interested in the Web3 industry as applications evolve and communities form. Popular crypto wallets like MetaMask store millions of dollars. These wallets are also prerequisites for Web3 authentication on any decentralized platform. If you are a newbie in the crypto world, what's better than setting up a wallet for yourself? It will definitely help you in the long run when you get your hands dirty on designing and developing dApps based on Moralis.
Are you all set to explore and navigate through MetaMask? Let’s go! Users don’t need rocket science or hours to set up MetaMask. It is just a matter of a few minutes, and the process is very simple.
In this guide, we will illustrate the step-by-step process to set up your MetaMask account on the browser. MetaMask is available both as a mobile application and a web browser extension. The example below is based on the Brave browser; Although the installation process is similar for all the other browsers, including Google Chrome, Firefox, and Microsoft Edge.
1. Download the MetaMask Wallet extension from the browser.
To download MetaMask, users have the following options.
Browser Extension: MetaMask is compatible with Brave, Google Chrome, Firefox, and Microsoft Edge browsers.
Android Application: MetaMask is compatible with smartphones using the android operating system.
iOS: MetaMask is compatible with iPhones.
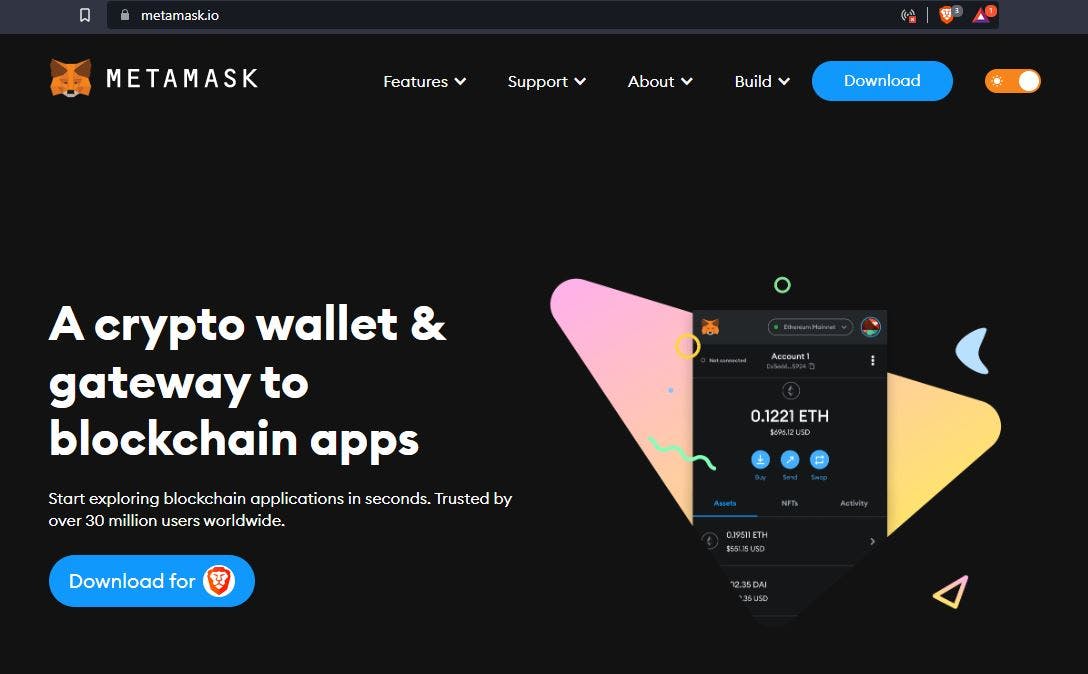
Once you select the browser compatible with MetaMask, visit the official MetaMask website. Click on “Download,” and then the website will redirect users to the web store.
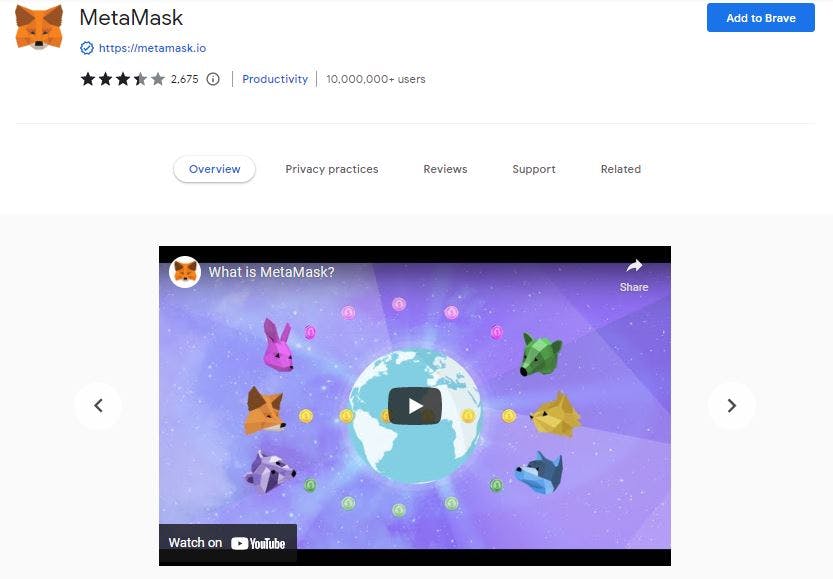
In the webstore, you will find a button on the top-right corner, “Add to Brave.” Click on the button, and an automated popup will prompt users to confirm the addition of the extension.
Viola the fire-orange fox logo will appear next to your browser bar upon confirmation. In case you use multiple browsers and wish to use the MetaMask wallet from the other browsers as well, then users need to separately install MetaMask. Thus users can use MetaMask from multiple browsers.
2. Create your MetaMask account
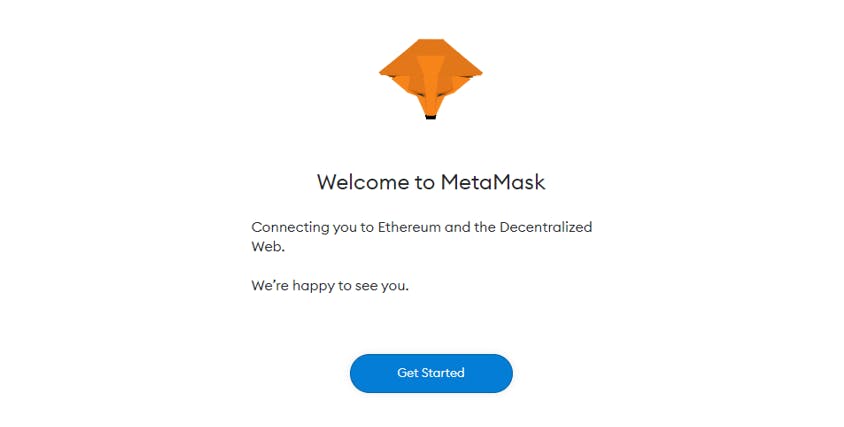
Once the MetaMask extension is installed, it opens a new tab where the sign-in process begins. Click on “Get Started,” and the screen will present two options:
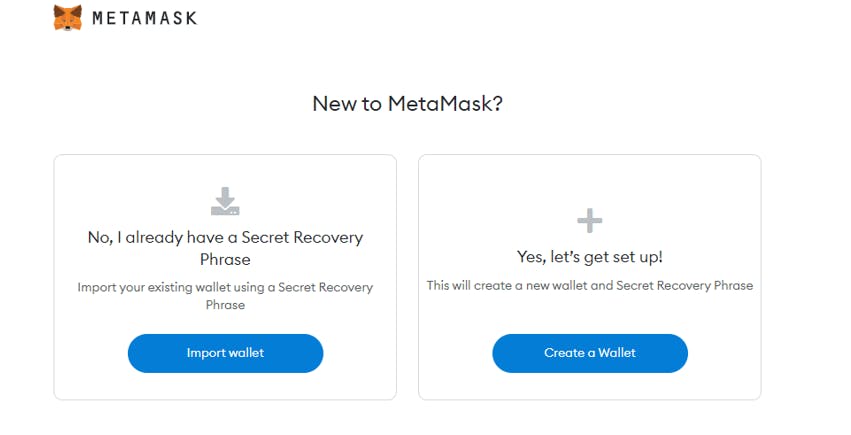
Import wallet: For users who have a MetaMask account on another device can import their existing wallet to the new device or browser.
Create a new wallet: For users who want to create a new MetaMask account.
Since this guide is for beginners with no prior experience with wallets, you can begin by building a new wallet account from scratch or importing an existing wallet. Let's show you how to set up a MetaMask account. To create a new wallet and a Secret Recovery Phrase, users need to select “Create a wallet.”

Read and agree to a few terms and conditions by MetaMask. After reading and agreeing, click on “I Agree.”
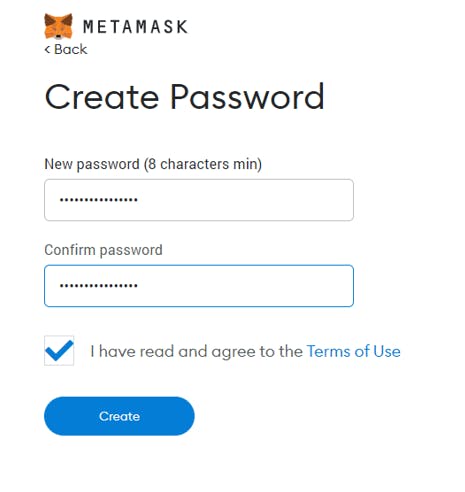
Next, create a strong password for the wallet by combining a set of lowercase, uppercase alphabets, numerals, and symbols. Never keep a digital copy of the password. In other words, taking screenshots, emailing the password to yourself, saving it as a note on the computer, or any other means by which the password is digitally accessible to hackers. After confirming, check “I have read and agree to the Terms of Use” and click on “Create” to move on.
3. Secure your MetaMask Wallet
Now that your password is created and confirmed, the next step is to secure the wallet. To ensure security MetaMask uses a 12-word Secret Recovery Phrase also called the “Seed Phrase.” It is a set of unique words that secures all the funds in the wallet.
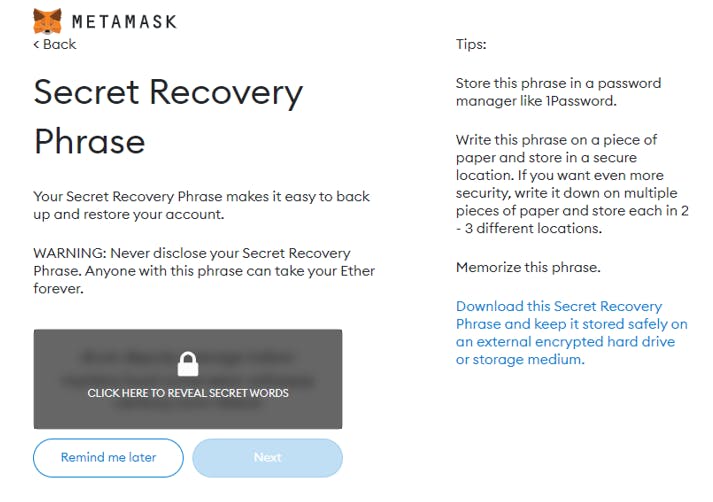
There are two options at this step: users can either reveal the phrase or skip it for later. But it is best to reveal the secret words at that instant since it is the most critical part of the setup process, and users should not jeopardize it.
After clicking on “Click here to reveal secret words,” users are advised to jot down the twelve words on a piece of paper in the order of appearance. The secret phrase allows users to easily back up and resort to their accounts and access their wallets from any device. In case the secret phrase is lost, then there is no alternative for retrieving your funds from that account. Thus, keeping a copy of the secret phrase somewhere offline is not just necessary but mandatory. This becomes the Private Key to the MetaMask wallet.
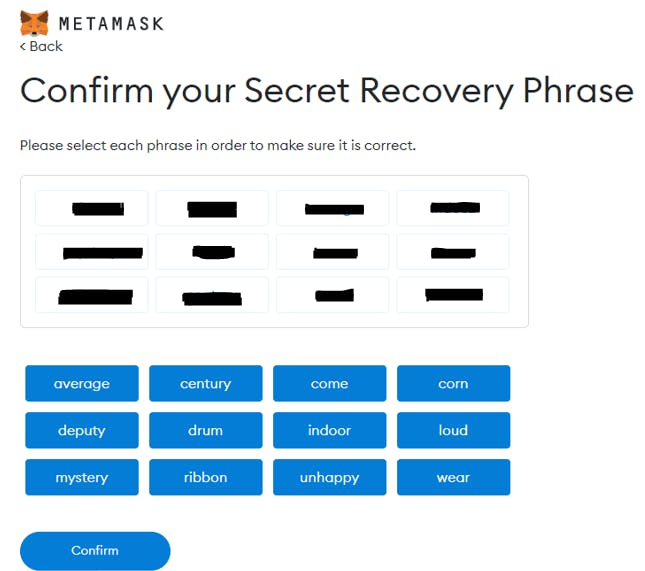
When users have safely noted the secret phrase, you can click “Next.” Now users need to verify the secret phrase by choosing the words in the correct order. After selecting the words, confirm the recovery phrase by clicking on “Confirm.”
4. Exploring and using MetaMask Wallet
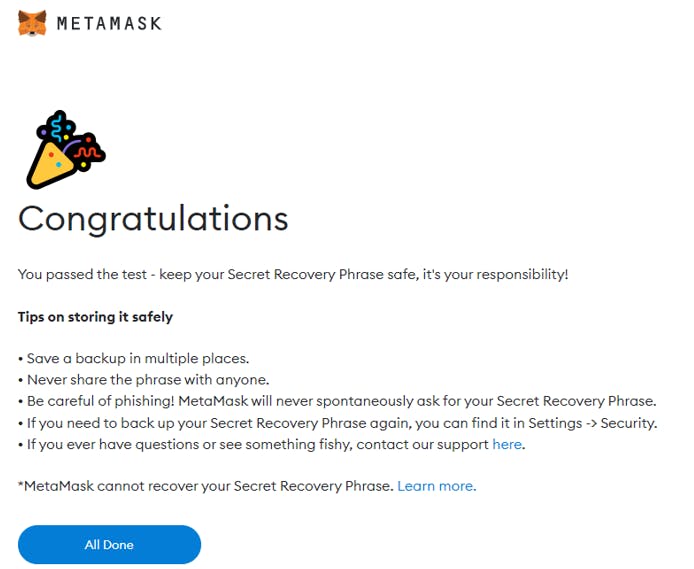
Drumrolls! Your MetaMask wallet is successfully created. Finally, you must have landed on the “Congratulations” message. You can go ahead and click on “All Done” and explore MetaMask further.
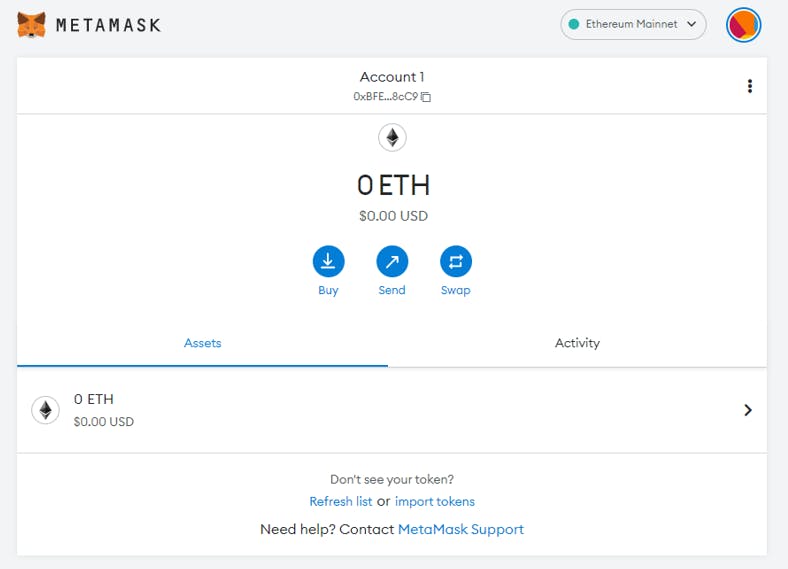
As the setup is complete, users can access different functionalities of MetaMask. It's finally time to use the crypto wallet. Using MetaMask is as easy as the setup process. Firstly you will notice that MetaMask has an Activity tab and Assets tab. In the activity tab, users can see the history and all the activities of the MetaMask account. Whereas in the assets tab, they can access the assets that are stored in the wallet. The hexadecimal combination just above the Ethereum symbol is the “Public Key.” Using the public key is similar to the bank account number. When your friend wants to transfer money to your wallet then your public key will be used to transfer the tokens.
Besides these two tabs, there are three more buttons called “Buy,” “Sell,” and “Swap.” These three options are used for different purposes. Their functionality is straightforward, as their names suggest.
- Buy Using the button will enable the users to buy Ether, either using fiat or deposit from another wallet. Along with authenticating and accessing dApps, MetaMask can also interact with other dApps, which implies having Ether is essential.
- Send When the users have sufficient amounts in the wallet they can send the currencies to other MetaMask wallets. The transfer is facilitated by the wallet address of the recipient.
The users can choose the rate of transfer of funds to the recipient. It can be either slow, average, or fast. There will be a slight variation in the gas price while sending the funds based on the speed chosen.
- Swap Suppose users want to swap a token for another, then the swap button can swap, for example, Ether for UNI.
How to change networks on MetaMask?
The MetaMask wallet is a cryptocurrency platform that enables users to use the wallet for authentication and interaction with decentralized applications. Once the user's wallet is connected to a dapp, then the user will be able to login in and use the dapp without any hassle. Ethereum Mainnet is the network used by default, but users have the privilege to add any EVM-compatible blockchains to the MetaMask wallet like Polygon, Binance Smart Chain, or Avalanche.
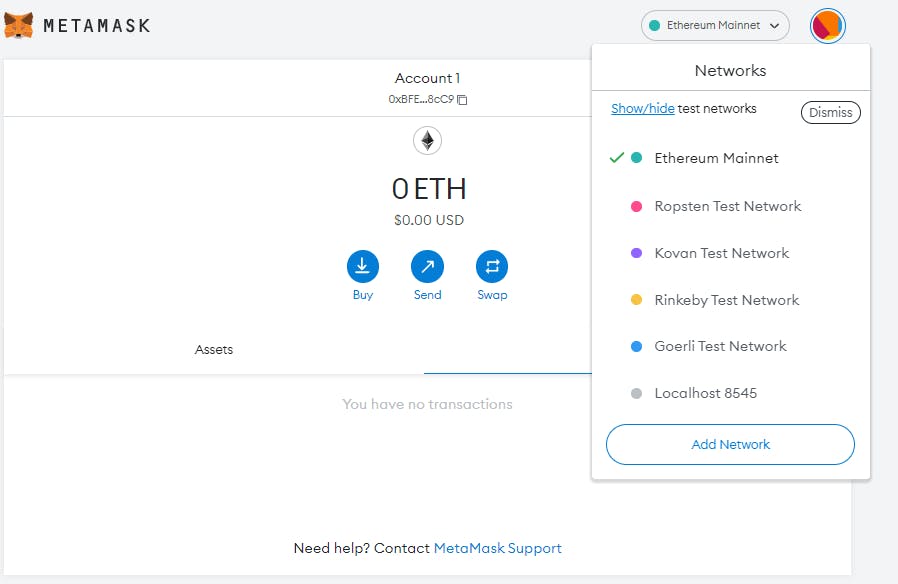
1. Select a Network on the MetaMask Wallet
To change the current standard Ethereum Mainnet to another network, users need to click on the “down arrow” next to the current network. Now users can select whichever network they want to change to. Suppose some users want to add another network, then at the bottom of the aforementioned list “Add Network” button is used for adding more networks.
2. Adding more networks
Users can manually add networks to the MetaMask wallet after the following screen appears. In MetaMask, users will find that the additional networks available are Ethereum Virtual Machine (EVM) compatible.
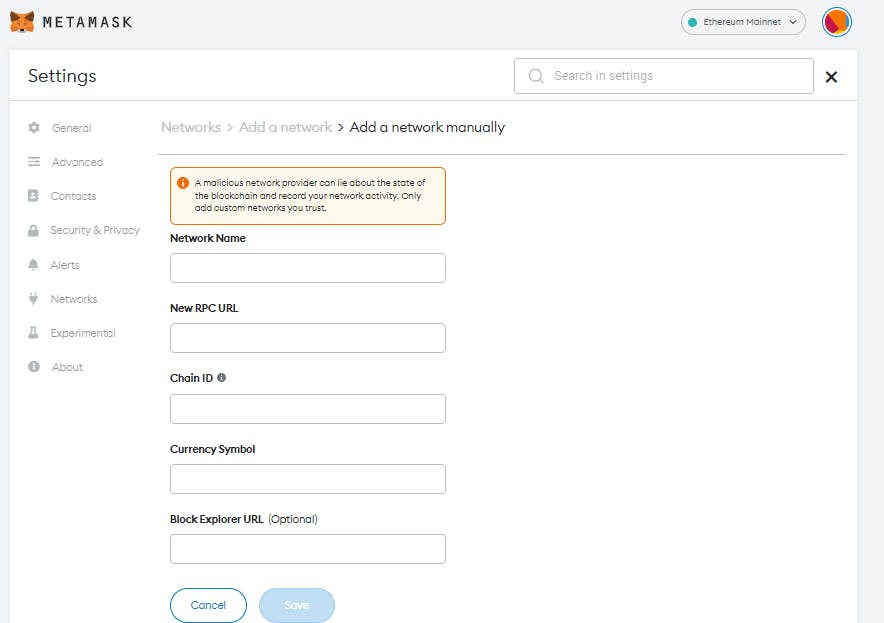
In the form, you will need to feed the following information:
- Network Name: it is the name given to a new network you wish to add. It is best preferred to write the name of the network you want to add.
- New RPC URL: it is the URL that acts as the entry point to the blockchain network
- Chain ID: it is a unique ID number associated with the blockchain network.
- Currency Symbol: it is the ticker of the currency on the blockchain network (example: MATIC, BNB, ETH)
- Block Explorer URL (optional): it is the URL that enables users to get access to more information about transactions via a block explorer.
After filling the form with the required details, click “Save.” Thus adding a new network in the network selection.
3. Networks users can add to MetaMask
The following are the details of some of the networks that users can add to the MetaMask wallet.
- Polygon
RPC URL: https://rpc-mainnet.matic.quiknode.pro Chain ID: 137 Symbol: MATIC Block explorer: https://polygonscan.com - Binance Smart Chain
RPC URL: https://bsc-dataseed.binance.org/ Chain ID: 56 Symbol: BNB Block explorer: https://bscscan.com - Avalanche
RPC URL: https://api.avax.network/ext/bc/C/rpc Chain ID: 43114 Symbol: AVAX Block explorer: https://cchain.explorer.avax.network - Harmony
RPC URL: https://api.harmony.one
Chain ID: 1666600000
Symbol: ONE
Block explorer: https://explorer.harmony.one
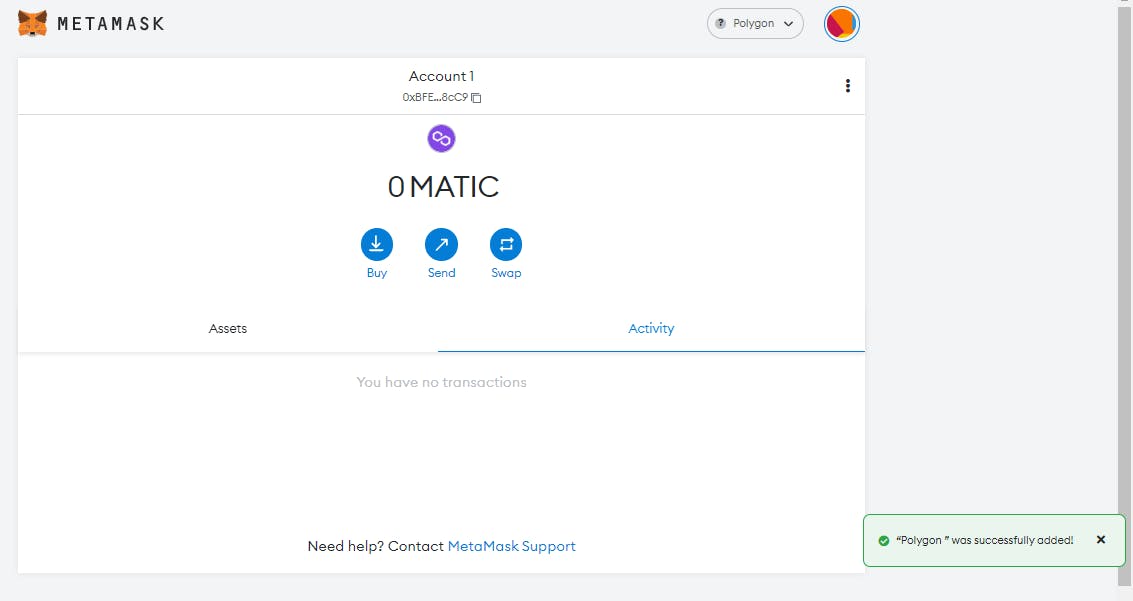
I have added Polygon to my MetaMask wallet. After adding a new network, you can easily change the network through the drop-down arrow next to the current network.
Conclusion and key takeaways about Metamask
Now that we have reached so far, I am sure you have learned and understood how to set up a MetaMask account and use it effectively. MetaMask is one of the most secure and reliable wallets, easily accessible as an extension next to the browser search bar. To use MetaMask, users need to use the password every time to log in. The setup process isn’t a challenge, on the contrary, authenticating dApps using MetaMask may get a little perplexing.
Although MetaMask serves as an Ethereum wallet, users can change to different types of networks within. As mentioned in the guide users can change to some of the test networks available in MetaMask. Users can also add additional Ethereum Virtual Machine (EVM) compatible networks like Polygon, BSC, Avalanche, etc. manually by filling a form with some basic details. In Web3 authentication, MetaMask is a must-have for developers and non-developers.